Create a new file and choose new on a black background document
By the pen tool just draw a thick and long mark and make sure your forground color is white
Go to filter located on top of menu bar and select Liquify
Draw flare effect long or shortly very smoothly
In layer palette make a new layer
Make a simple draw by pen tool and create flare by Liquify filter
Create every flares by making new layer for every single flare effects (Do not use same layer)
To gather every layer in single one, just go to Layer on the menu bar and choose flatten Image
Then create a new layer from the layer palette to create the abstract effect on that
Draw by pen tools using pen tool on that new layer. Use colors whatever you prefer
From the layer menu click on overlay to make it looks like abstract
This is what we wanted at all
create colorful abstract flare in photoshop
It is very easy to remove anything from any image in photoshop like this picture
so let's get started..
Go to the tool bar and choose clone stamp tool which located left
On that image, right click on mouse and choose the first brush with size 200px and hardness 0
Select a suitable and nearby area by which the animal will covered by
Start covering the animals by the area you selected
Then cover another cow carefully. you can select any area which is suitable to you
After removing the big animals now you can proceed to cover the small animals
Finish them one by one you can change these cover areas in several times
Go to left and choose quick selection tool
select leafs of the tree just nearby the cables
right click on selected area and click Layer Via Copy to separate it from the cables that we are going to remove
After that choose the background layer to work on it
Start removing the cables from left before that select the sky from above from clone stamp tool. it is easy !
And then cables nearby the leafs. now it won't remove the leafs
so we got our clean image without animals and unexpected things
how to easily remove anything in photoshop
Want to create an image like this ? Let's start with me..
Go to File> choose New > give any width or height of the
document
From the left tool bar click on rounded rectangle tool then go to top bar under menu bar and change the radius to 130px or any radius then hold left mouse button and move to right and down to enlarge it,as you want and it will be created in a new layer itself
On that layer go (fx) or filter button
choose Gradient Overlay from the menu
it will open a window like this
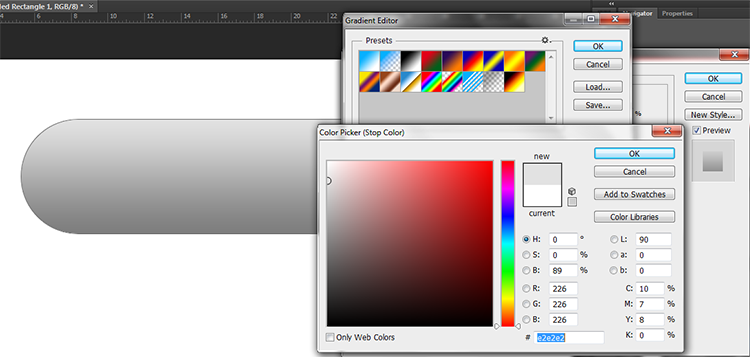
click on down left color button and the color option located below to choose any color i choose little bit dark grey
Then another color from the right down button and choosing little bit brighter grey
select the type tool just above the pointer in the left
and type anything
On the layer palette, go back to Rounded Rectangle 1
right click on it and choose Copy Layer Style
Go to the type (Fixed text) layer again right click an just paste the layer style
Now it look like this and not good
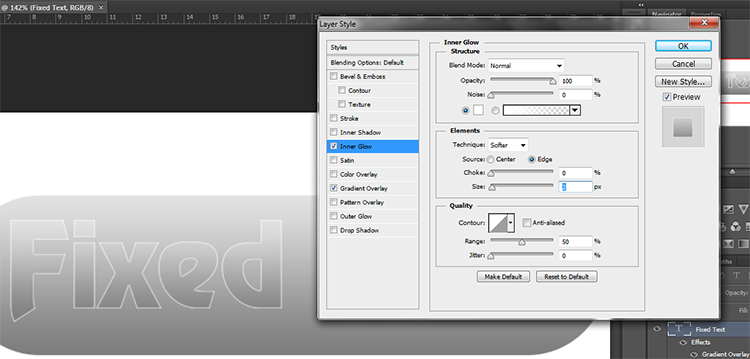
go to the filter button and click Inner Glow or Blending Option..
Choose Blend mood to normal from top, opacity 100% , choke 0 and size 2
click on inner shadow Opacity 75%, distance 3, choke 0 and the size 5
If you want then just delete the background from layers
Okay we got our fixed text image within very short time ! ! !
How to create fixed text on any logo in photoshop
Subscribe to:
Comments
(
Atom
)


